"Who can suggest how to reinforce or rebuild the original heater boxes? On one side of my Type 180a Ponton sedan, the cardboard ducting is essentially all there, but with one medium sized hole and some weak and crushed areas. What is a good way to reinforce and patch the old cardboard? Wire mesh and papier-mâché? Would a fiberglass repair kit do the job?"
Here you will find some answers to the questions brought on by the challenge of refurbishing Mercedes-Benz Ponton heater boxes. This page is not meant to be a comprehensive resource, but rather, it includes several ideas and techniques that recently came to light among an ever growing list of articles on the subject. For reference, there are other heater box repair articles on the Ponton Workshop page.
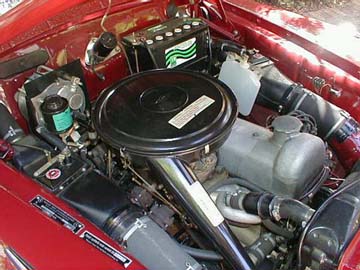
Photo 1. This is the ideal situation. Both heater boxes in excellent original condition
1958 Type 220S cabriolet (right hand drive) owned by Graham van Heerden of South Africa
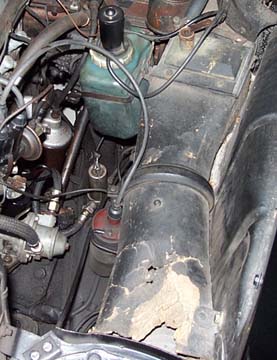
Photo 2. Since the heater boxes were made from cardboard paper, they often look like this
Photo courtesy Jeff Miller / 1957 Type 190 sedan
Joe Alexander / ja17@att.net / Blacklick, Ohio
Joe writes, "I used to manufacture a high quality polyester/fiberglass heater box for Bud's Benz. They were virtually undetectable in appearance from the originals but were almost indestructible. All the factory details were molded in, rivets, seam, etc. The production molds were made from an original new old stock (NOS) Mercedes-Benz heater box. The tooling consisted of two main molds, two heater flap molds, and two router fixtures. The original metal output tube and the metal mounting flange could be re-used or two molded exact reproductions could be used. Bud's at the time, very nicely reproduced the complicated metal flap shaft and hardware which was used when the originals were missing or unusable. I manufactured the driver's side only, since the Type 190SL had a metal heater box on the right side which never went bad. However the Type 220S/SE Ponton sedans and cabriolets used the same heater box with a different output tube and mounting flange. Other Ponton models used the same heater box with a one piece flap and the sedan output tube and mounting flange. I got out of the fiberglass business in 1985. It is nice to know that these units are available again (as of April, 2003) from Mercedes-Benz and the dealers. I am afraid to ask how much they cost. Enclosed are some interesting photos for your review."
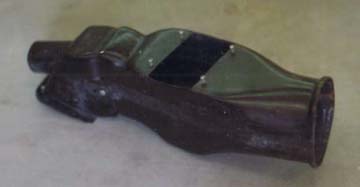
Photo 3. Joe Alexandar's high quality polyester/fiberglass heater box — no longer being manufactured
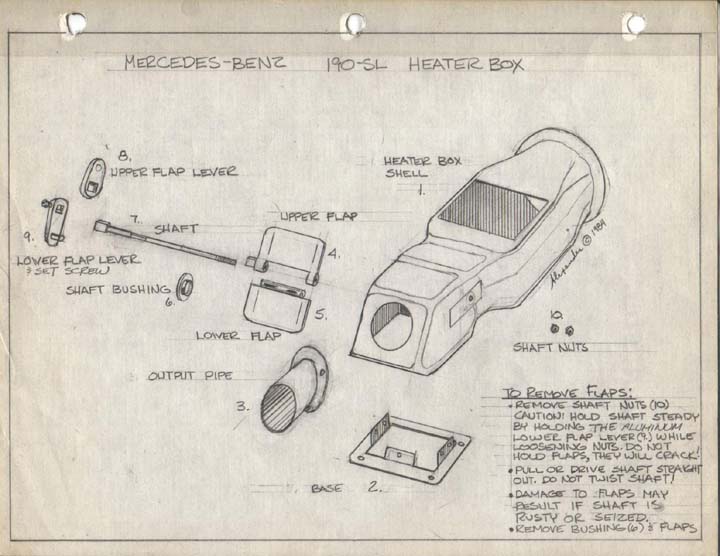
Illustration 1. Heater Box Diagram / Courtesy Joe Alexander
Joe continues, "These cardboard units are all very similar and the shell is basically the same in all Pontons including the Type 190SL roadster. The right side of the 190SL is the exception with a narrow metal heater box to make room for the elaborate carburetion. The metal parts and internal flaps of these boxes varied from model to model. These metal parts were usually riveted on from the factory and consisted of the metal output tube, the lower mounting flange and sometimes an inner metal deflector. The cardboard shells were mostly the same between models except for these metal parts. The right and left heater boxes are obviously different. Another point of difference may be the flaps and the flap shaft. The 190SL and Types 220a/S/SE Pontons had the dual flap set-up while the Type 180/190 series had the single flap set-up. As a consequence some of the linkage parts are also different. These parts will change over. In other words one could make a 190SL heater box from a Ponton sedan box. Flap shafts get rusty and often times the flaps are destroyed during disassembly. Be careful, especially with the complex dual flap unit. Review my illustration closely. Many heater boxes have been destroyed by tearing the box during removal. The mounting flange on some models has a mounting screw hidden inside the car under the dash! This is covered in the Service Manual. The heater core itself was very much alike in all models except the output pipe and inlet pipes on the top and bottom of the cores would be soldered pointing different directions depending on the model. One can re-solder a core to make it fit any model Ponton or 190SL . So any good heater box shell or core can be made to work in your project as long as it is the correct side and you have the metal parts, and possibly flaps from you original heater box. Some people have been successful doing quality repairs using fiberglass and polyester resin. Sanding and painting afterwards for best results.
One common problem with these heater box assemblies is that the cylindrical coolant valve gets stuck or very hard to operate over time. Then the heater levers will not operate. If forced the cable or linkages are bent or broken. The prevention is change coolant on a regular basis (two to three years), it has a lubricant in it. Also if needed let the coolant warm up before attempting to operate these valves.
These valves can normally be loosened up. Some people have had success with using a cooling system flush. Stuck valves may free up by exercising them, with the flush in the system with the engine hot and running.
Dis-assembly and cleaning may be necessary. Relieve coolant pressure by loosening radiator cap. First remove the small slotted screw and remove the linkage arm (cable can be left attached). Next the cylinder must be pushed down a bit so the small metal plate can be slid out of the valve unit. Please observe how the outside top of this cylinder valve has a slot machined in it, where the metal plate protrudes. The tiny bridge of metal above can easily be broken off if stressed. So be careful not to pry or strike against this "bridge" when working on the valve. It is a good idea to mark these parts to facilitate installation later, since correct orientation is not obvious. Now use the threaded end of a "spark plug" to pull the cylinder upward and out. There is a rubber seal at the top that you may wish to replace. Clean the valve and the inside of the cylinder with some very fine steel wool and some solvent or penetrant. The valve should be tested for ease of operation after cleaning. In very severe situations, I have used a brake cylinder hone to clean tough deposits off of the inside of cylinder to clean everything up.
Assembly: I use some waterproof faucet grease before re-assembly. Observe that the opening in the valve must be lined up to the opening in the cylinder when the heat is fully on. Hook the levers and linkage up to correspond to the correct position for heat.Replacement: If replacement of the valve is necessary heater cores from any ponton will provide good donor parts since the only difference in the heater cores is right and left and the direction the valve is pointed when soldered in place. Many later series "fin" series and W108 chassis Mercedes cars will also have some usable parts that can work in a pinch. If you are not a good plumber any radiator shop should be able to solder a new valve in place. Be sure the cylinder is removed first so the rubber o-ring is not burnt.
Heater Fans — misc.
The Type 190SL had a single-speed heater fan on the driver's side only. Many Ponton sedans had two-speed heater motors and an optional heater motor on the passenger side also.
Thierry Savidan / sabaidy@laonet.net / Vientiane, Laos
Visit Thierry's Restoration Page
Thierry decided to be resourceful and built two heater boxes from almost nothing. "Basically, I made a shape from the remains of the heater box I had. Very little remained as mice had eaten most of the cardboard. Then I painted the shapes with wax and covered with glass clothes with polyester resin. Then cut in two to take out the shape. Re assemble the two parts with glass and resin and finish. Next I will rebuild and install the flap system. Then a black coat of paint will give the look of the original ones, but lighter and mouse resistant this time. I made the shape in two parts to have the possibility to make the symmetric one for the opposite side. That is the basic idea."
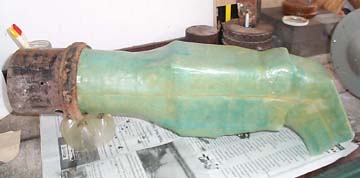
Photo 4. Fiberglass Shell
"You know it was a big job for me because nothing was left from the heater boxes, just the metallic parts. So I spent a lot of time making the plaster shapes. But once it was done, it is just easy polyester and fiberglass to make. If you can get a pair of damaged heater boxes you will have a better place to start. Remove the metallic part that fits the two halves together. And it is not a big job to make a plaster from them and then you have done 90% of the job already. It would be better than mine because I will not have an exact reproduction of the original shapes. But they will work very well indeed."
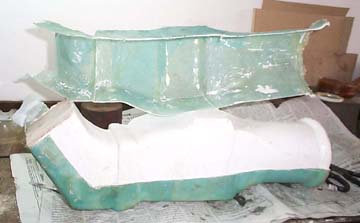
Photo 5. Fiberglass Shell
"I am now adjusting the flaps mechanism in the heater box, with restored hinges and axle. It is a long job, but comes out very nice. If there are some remains of the heater box it is easy. Not like mine! You just make a shape/mold of the heater box in plaster. I used lots of wax to ease de-molding and then make the new ones in polyester and fiberglass. That is all. I used the same principle for the new flaps. Sandblasted the metallic parts, reworked new shafts, fit everything together again for another 45 years of life?"
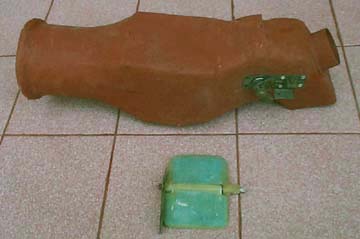
Photo 6. Installing Hardware
"I got new shafts from a local vendor and I am making two new sets of flaps for the heater box now. The cost is just the price of 2 kilos of polyester resin, a square meter of fiberglass cloth, brushes and paint. Cheaper than the after-market vendors and Mercedes-Benz. That does not include the time to do it of course, but when you like to do it, it is a plus. Here are a few more photos of my progress in rebuilding the heater boxes in polyester from nothing."
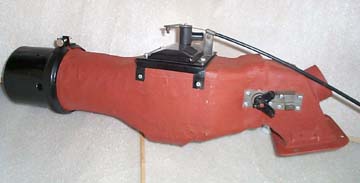
Photo 7. It takes a very skilled hand to create the boxes from almost nothing
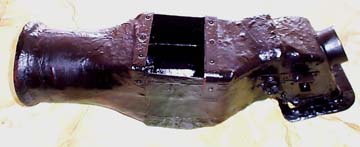
Photo 8. Some of the hardware was removed to paint the boxes black
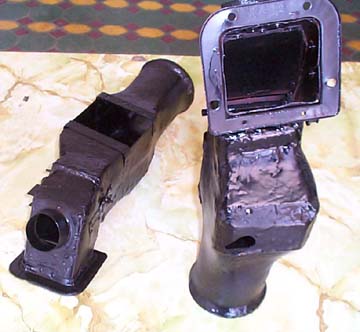
Photo 9. Heater Boxes without the hardware
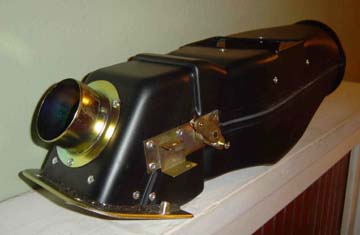
Photo 10. Photo courtesy: Bob Glasgow / November 21, 2003
For those who are not as inclined to repair or re-construct the heater boxes, there is an alternative. Replace those old, worn out cardboard heater boxes! As of this writing, new replacement heater boxes are available from MBUSA or directly from any authorized Mercedes-Benz agent. They are pre-drilled and cut to accept the heater core and include the hardware and both internal flaps. They are constructed of black plastic with metal hardware.
For the Type 219 sedan and Type 220S/SE sedan, coupé and cabriolet
Left heater box: 180-830-07-62-10 / $304.00 list price / $258.00 your cost
Right heater box: 180-830-08-62-10 / $304.00 list price / $258.00 your costFor the Type 180/190 four cylinder sedans
Left heater box: 120-830-17-62-10 / $254.00 list price / $216.00 your cost
Right heater box: 120-830-04-62-10 / $254.00 list price / $216.00 your costThe heater boxes come with some internal parts, but not with the cores. The delivery time from the Classic Center in Germany is five to six weeks.
Courtesy: Tom Hanson of Caliber Motors / Prices and part numbers as of April, 2003
Delivery may be faster since the Classic Center also opened in Irvine, California. Tom Hanson is now the director of retail parts at the Classic Center in Irvine. — Ed. September 20, 2011
References
- Some after market vendors (eg. Miller's) also sell fiberglass heater box replacements. Contact the vendor to verify what hardware is included or otherwise available.
- Contact information for all (new / used / OEM) parts vendors is located on the Links page
Created: April 20, 2003 / Jeff Miller
Last Revision: September 20, 2011
© www.mbzponton.org