Chris Greene / 1959 220S sedan / White Bear Lake, Minnesota / greene1634@yahoo.com
International Ponton Owners Group (IPOG) message 120539...
Can anyone help me with how to remove my hood? Any gotcha's or springs that might snap back?Alfred HeatonReplies...
Granada Hills, California
aheaton71@yahoo.com
January 16, 2015
As long as you don't try to remove the hood springs, nothing can go wrong. Just be careful not to loose any of the spacers where the hood bolts onto the inner fenders Leave the hinges on the hood as shown in Photo 3.Gary KusterI have done this job three times in the last year and a half, and was thinking of writing an article for mbzponton.org. The first time a friend helped, but the other times I did it myself. It's really amazing to see what the engine bay looks like with the hood off. In addition to the above, I would suggest:
Port Moody B.C., Canada
garykuster@yahoo.com
January 16, 2015
- Have several feet of space in front of the car so you can pivot the hood around. Make sure you have a place to put it.
- The hood on my 220S sedan weighs 38 pounds, including the 8 pound grille. Plan accordingly.
- I used a ratcheting tie-down strap instead of a rope because it's easier to adjust the length as needed.
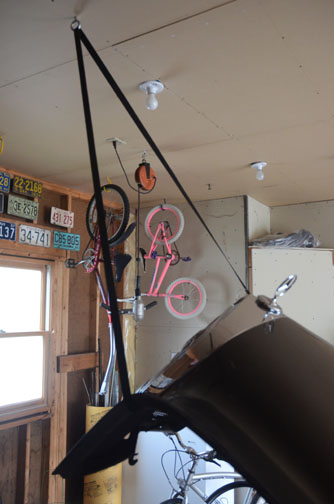
- When you hang the hood from the ceiling, pick a hanging position that will put just a little forward pull on the hood when the last bolt is removed. You don't want the thing to swing rearward and whack your windshield when it gets loose. See photo 1.
- You also don't want the hood to get dragged across the fenders. So before you start unbolting, attach some kind of padding to the corners. I used a leather work glove on each corner, secured with a bungee cord. See photo 2.
- Note the height of the open hood when you remove it so that you know what height to raise it to when you re-install. It will be easier to remove if you open the hood a little above its natural stable point (this may vary depending on how old and tired your hood springs are.)
- I undid the two front bolts first. Then I undid one of the rear bolts, stuck a screwdriver through the hole where the bolt was, and undid the rear bolt on the other side. Then I went back to the other side, pulled out the screwdriver, and lifted the rear end of the hood. I pivoted the hood 180 degrees (so the grill faces rearward) and lifted it off the tie-down strap. Since the leather gloves were on the corners, it was easy to set down.
- Those hood bolts tend to fly all over the place. I once took more than half an hour to find one; thought it had been beamed onto the USS Enterprise or something, then finally found it far underneath the heater box.
- On my car, one side has a nut welded onto the hood, but the other side (left) has a crenellated nut that is something of a pain to hold on to when removing and installing the bolt. I jammed a flathead screwdriver into the grooves on the nut. (Anyone know if that's normal, or are there supposed to be welded nuts on both sides?)
- When you remount the hood, install the rear bolts with the hood hanging from the strap. You will probably find that you have to raise the front of the hood higher in order to line up the holes on the hood with the holes on the hinge. That's where the ratcheting tie-down strap is handy.
Photo 1. Ensure the hood falls forward when the last bolt is removed / Chris Greene
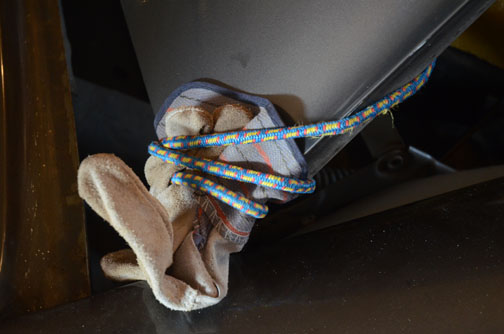
Photo 2. Rear corners protected by leather work gloves secured with bungee cords / Chris Greene
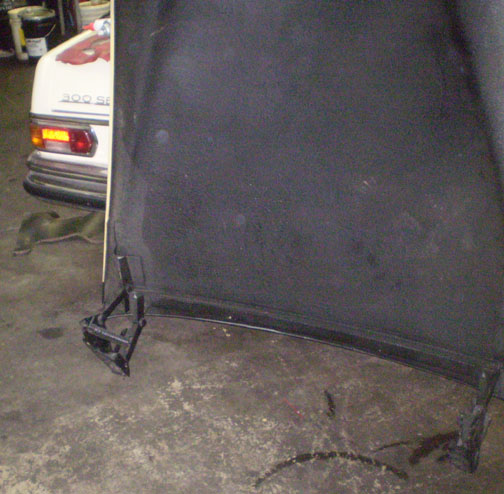
Photo 3. Leave the hood springs attached / Gary Kuster
Good luck and enjoy the new perspective on your car!
Chris Greene
1959 220S sedan
White Bear Lake, Minnesota
January 18, 2015