Kevin Van Slooten / kvanslooten@yahoo.com
Santa Fe, New Mexico / 1958 Mercedes-Benz 220S Ponton sedan
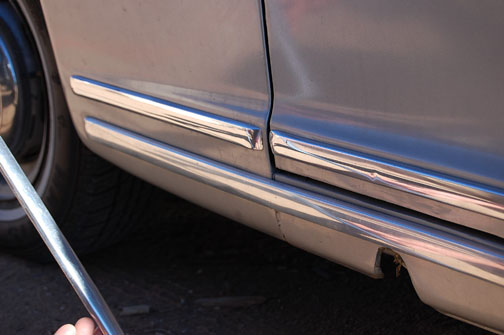
The Mercedes-Benz Ponton exterior is such a voluptuous thing to behold, enhanced by the many garnish moldings which accent its curves and special contours. These trim pieces are made of either light weight aluminum, which are clip fastened onto the body, or heavier solid brass with chrome plating, which are bolted on. Some, of course - as on the window and rain gutter surrounds - are attached using snug smallish Phillips screws.
The aluminum pieces take a toll being peppered by salt spray, high speed dirt and tar from the road surface, and wind driven moisture. Door dings and good ol’ sun damage over a 50 year period can make a car’s chrome look like it has had a bad night of heavy drinking. Any dents, or deep scratches need to be addressed before starting the following process if possible; bending the trim back into place can sometimes be done with a cedar shim and a few delicate taps.
The disassembly process for the trim is usually fairly crude, and many get trashed due to callous removal techniques. While body shops usually send these delicate soft metal pieces out to a specialist, the Ponton enthusiast might fare well knowing how to refurbish the many pieces found on the car from a home shop perspective. The following process for fixing up the moldings is specific to the aluminum trim.
I started this refurbish project with needle nose pliers, a 7mm socket, a Phillips screwdriver, and of course some Tri-Flow or WD-40 to carefully remove the moldings. On the W180 220S saloon there are 23 very hard to replace garnish trims (made of aluminum) so I hope this helps you do-it- yourself owners. In doing the count on my car I found four window surrounds, four upper door moldings, two windshield bezels, three rear window area surrounds, six lower door/fender pieces, two rocker moldings, and lastly - the most fun to restore - the rain gutter trims. There are two of these - one each above the left and right doors.
The aluminum we are focusing on has an anodized coating, so the hardened outer surface must first be destroyed in order to proceed. This coating is applied electronically to each piece then attached to the car at the factory.
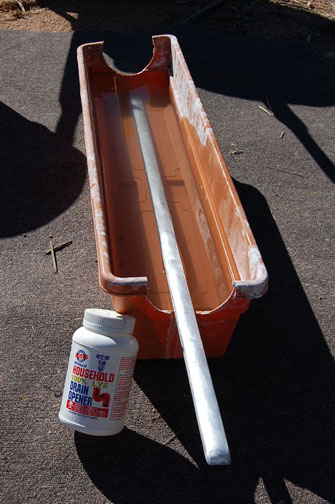
To break this coating I first soak the pieces in a bath of lye (sodium hydroxide) easily found at a local hardware store. It is best if fresh from the canister mixed into warm water; my older, stored lye did not work as effectively as the fresh lye. A kiddie pool, or in my case, a flower window-box made of plastic from a big box home improvement store, worked well to submerge the trim pieces. I could see the foaming action of the acid working on the damaged and aged trim. Set an egg timer for about five minutes for each piece. Neutralize in fresh water after the acid has done its job. The material should look dull and “softer” when this process is done correctly.
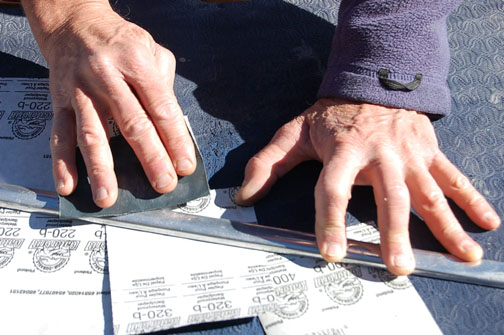
Your trim is ready at this point for some wet sanding. I start with 220 wet or dry sand 3M paper (or the like) and a spray bottle with a little warm water, working the trim down to remove all scratches and imperfections knowing the concourse trial judges will be looking closely at this stuff in the near future. After this I go to 320 grit and do the same with each piece, ultimately finishing with 400 grit sanding. Swirl movements work the best, but linear sanding will do, it’s just more work to remove the sanding marks down the line.
At this point one becomes very involved and hopeful regarding the final result because the trim - which hopefully looked straight to start with - is beginning to emerge closer to what you could imagine is the original form.
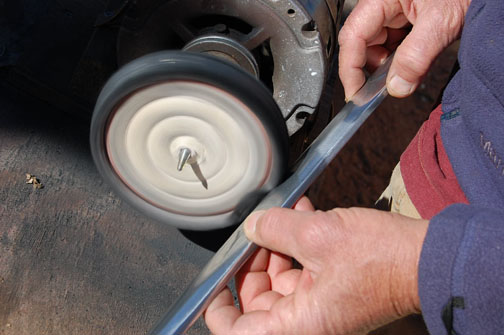
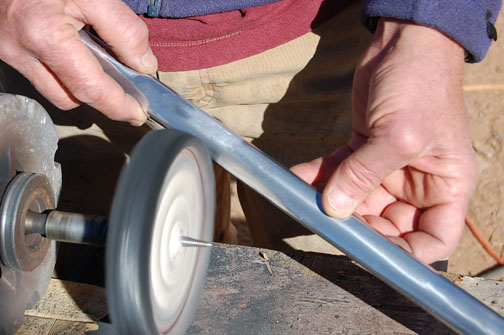
Buffing is next. I found a used jewelers’ wheel (a 110 motor with a buffing wheel attachment) and it came with a box of different bars or polishing compounds. I plugged it in and watched the garnish trim go from the gutter to the front line. Sun glasses are a must during the day if you’re in a sunny climate zone as the glare will call for eye protection.
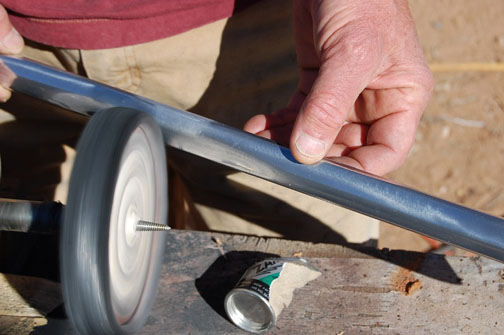
One has to take extra care not to wrap the light weight pieces around the shaft of the motor. I used a 1750 rpm motor with a reverse screw shaft to thread the cotton buffing wheel (6”) at a local jewelers’ outlet. Thunderbird Jewelers Supply in Albuqerque, New Mexico was a good source for a variety of supplies. Go to Thunderbirdsupply.com. I had good luck with a couple of compound bars - one called "Tripoli", and another brand, "Zam" - to achieve a mirror like shine. Tripoli is popular in the silver jewelry trade.
From here the trim looks like new, but the environment will work it to a dull finish within days. To reduce this effect I chose to clear coat the trim with an acrylic lacquer. My body shop did this for me at a modest cost while they were spraying the big heavy stuff, like whole cars. I paid $10 apiece for the clear coat. This is done before reinstalling the trim on the car.
The other "original way" is to anodize the metal in a bath of electrified sulfuric acid – not recommended for the average kiddie pool! Additionally, since 2001 this has become the more difficult path to get the same finish that a clear coat protective finish would provide.
Installing the garnish is fairly straight forward, but slightly different than “the opposite of removal” that is so often suggested in the service manual. One needs to make the large T-clips that hold the larger pieces, like the rocker moldings and the lower door moldings. I found that the OEM Mercedes “W” clips just didn’t have the pull necessary for the weight of the rocker trim. Making your own is an easy process which requires some sheet metal, 4mm nuts and bolts and some T-nuts from a local hardware store. Having a Dremel grinder and some patience makes it go even easier.
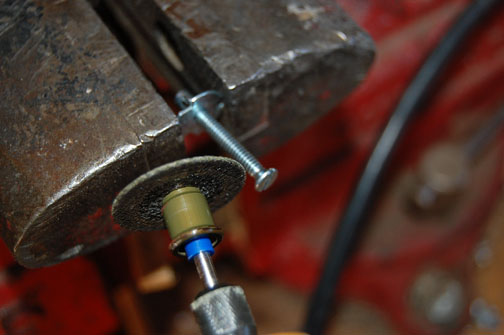
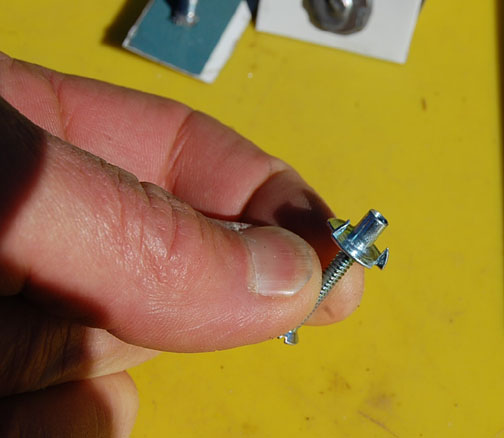
Start by cutting up some rectangular strips using tin snips from a tin can, or an old sign etc., drill a hole in the specimen large enough for a small bolt to pass thru, then glue up the bolt to the metal base strip with JB Weld or other epoxy. I cut the heads off the 4mm machine screws to make these. See photo.
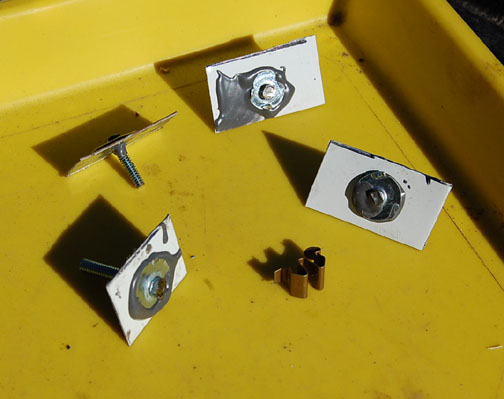
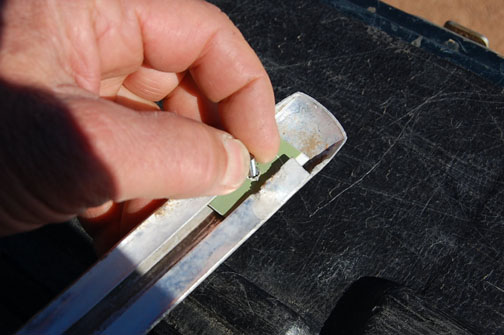
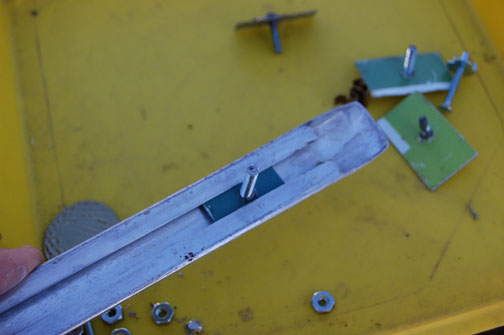
You should end up with a clip which has a threaded bolt on one end and the sheet metal “T” on the other at a right angle to the sheet metal portion. Slide these into the channel on the rocker trim and attach a few washers, and the 4mm nut from the back side. These homemade clips will hold the Ponton trim on without any, or close to no, chance of falling off. Archival photos often display the 190 or 220 series Pontons with several missing pieces of this beautiful accent trim. I used a combination of the OEM clips part # 000-988-59-78 and the shop made T-nuts, and the team seems to work fine.
Created: December 20, 2011 / Jeff Miller
© www.mbzponton.org