No too bad, but a lot of work ahead
Andrew H. Litkowiak / andylit@feralwombat.com / Illinois, USA
Well folks, it's time for the next installment of "How To
Get Really Dirty and Covered With Paint", otherwise known as the 1958 Type
220S Mercedes-Benz Ponton Restoration Project. When we last saw our hero
(that's me), he was putting away his tools after removing every last bit
of hardware from all four doors. Several weeks of heavy rain ensued locally,
flooding the garage at one point.
Once the flood waters receded, it was time to get back to work. The purpose
of removing the outer trim and door handles is obvious enough. It makes it
easier for the painter to work on the car when we reach that stage. Why go
to all the trouble of removing the door guts, especially if everything works.
Read on, and you shall see.
Remember that we're dealing with a car that is older than your hero (that's
me). Even though it has spent its entire life in Arizona, there are bound
to be some rust issues. Because of the arid locale, it is almost a guarantee
that we will find rust only in enclosed areas. Remember the rusty bolts in
the door handles?
Unfortunately, this car will live for the foreseeable future in the Chicago
area. That means high humidity for much of the year. Even with a heated garage,
this climate will attack the existing rust and push it into overdrive. If
we don't stop or eliminate the rust now, it will eat the car from the inside
out and all that hard work and money will be for nothing.
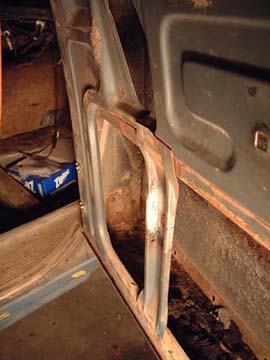
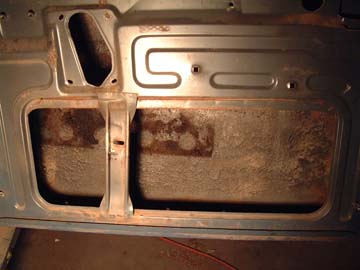
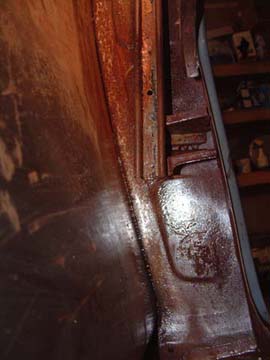
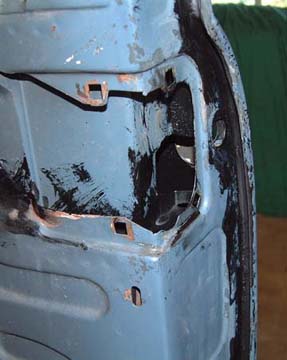
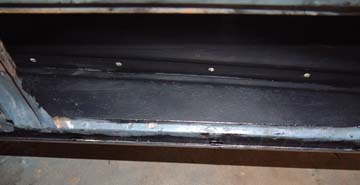
The first look inside the passenger front door confirms my suspicions.
Overall, it's pretty good, but the door bottoms and especially the inner
skin are rusted up. The outer skin has been mostly protected by a rust-proofing
compound, but even that has begun to fail over the years. And, there is 50
plus years of crud accumulated on the door bottom.
No too bad, but a lot of work ahead
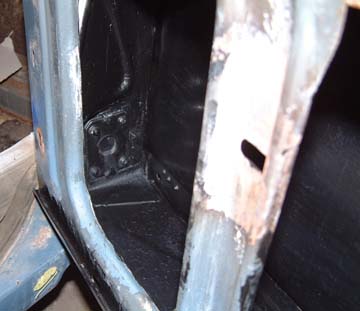
By inner and outer skin, I mean the interior door surfaces
facing the cabin and the outside, respectively. If you imagine the door as
a ham and cheese sandwich, we're talking about inner surfaces of the two
slices of bread. The window and lock stuff are the ham and cheese. You are
free to imagine the rust-proofing as the condiment of your choice.
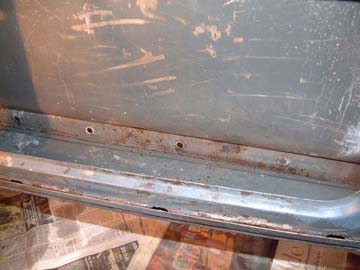
The next step is to vacuum out the bottom for a better look at what we
are dealing with. A little scraping and suction reveals the true nature
of the enemy.
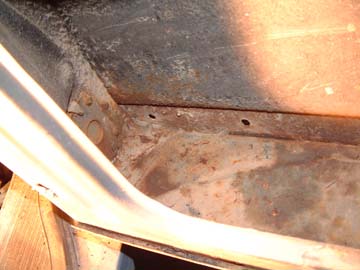
Rust

Rust
More Rust
The tools of this operation are simple but surprising. Scrapers and wire brushes you expected, but oven cleaner? Yes, oven cleaner. You'll see.

Standard Stuff
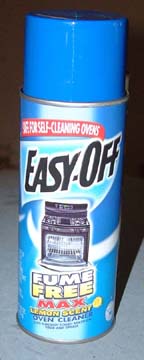
Oven Cleaner?
Being faint of heart, I tackle the easy stuff first. Before I get to the interior, I have to remove all of the hardened adhesive from the weather-strip channel. After all those years in the sun, it's pretty solid. Before starting with the die grinder, I spray the channels liberally with 3M adhesive remover. I suspect that almost any petroleum based stripper will work, but I happen to have a can handy.

Old glue, hard as rock
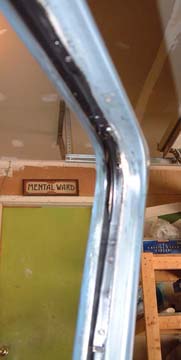
Once the stripper had soaked in for a half hour or so, I got
started with the die grinder. I used a nylon bristle stripping wheel instead
of a wire wheel. No matter what I use, the paint is going to come off with
the glue, but there's no need to gouge up the steel. I suppose that if I
was very patient and energetic, I could remove the glue without touching
the paint. I have no desire spend the next month gently rubbing the glue
off, so here we go.
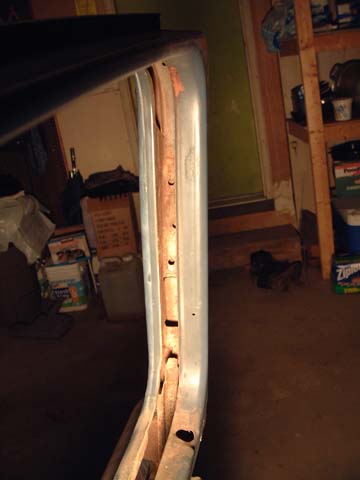
The nylon wheel makes short work of the glue. In a few minutes, I have
bare steel around the entire perimeter of the door. I have a compressor and
air tools, but you can use a regular electric drill to get the same efficiency
and speed.
Now that I have no more excuses, it's time to get going on the door
interior. The first item to go is the sound dampening pad. It looks like
a giant, woven horsehair White Castle burger. Square with round holes. A
sharp edged scraper makes quick work of it.
Anyone for a Slider (White Castle Burger)
After a monumental sneezing fit, I remember to take my own
advice. Time to put on a filter mask. The next step is to scrape off as much
of the rust-proofing compound as possible. I suspect that it started life
as a soft rubberized or asphalt based coating, but after all these years
the stuff has vulcanized.
I used a sharp edge scraper and a lot of elbow grease. You will need
a shop light inside the door to see what you are doing. The coating goes
almost all the way up to the top of the door. You will be sticking you head
into the door and twisting around a bit to get all the coating. Don't worry
if you don't get every last speck off. The idea here is to remove the bulk
of the coating before zapping the rest of it.
Now that all the dust and chunks are down in the bottom of the door,
grab your handy shop vacuum and suck it all out. There's still quite a bit
of crud in the bottom. Over the years, the dirt has attracted moisture
and slowly built layer upon layer of caked on mud. Eventually, the mud clogged
up the drain holes in the bottom of the doors.
All car have drain holes in the door bottoms, even modern cars. No matter
how good the rubber edging around the window is, rain and snow melt will
always get down inside the door. It has to have someplace to go. I've encountered
doors on local junk yard cars that actually slosh when you open them. With
clogged drains and a couple years of weather, it's not unusual to drain a
gallon or more of water out of a door.
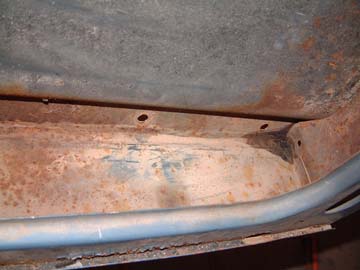
Scrape the door bottom and vacuum again. Grab a small flat head blade
screwdriver and run it along the groove at the outer bottom edge. Vacuum
yet again. Repeat this until the groove is mostly clean and you can poke
the screwdriver through the drain holes.
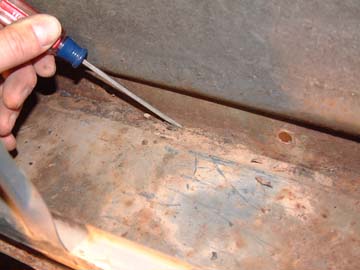
Clean thoroughly and repeatedly
It's time to cover the floor under the door. I use old newspapers.
Generally, two full sections will do to protect the garage floor. Be sure
to keep a big garbage bag handy as you will have to replace the newspaper
a couple times. You will also want to put on a long sleeve shirt and some
dishwashing gloves.
Break out your can of Easy Off and commence to spraying. I use the enviro-friendly,
lemony fresh, no gloves required version. Spray the interior at every point
that had the black coating on it. Let it soak for at least an hour. You can
start scraping and vacuuming another door while you're waiting.
You may be asking why you spent 20 minutes of dirty, dusty scraping if
the oven cleaner will take this stuff off. When you see the mess that you
are about to dive into, you'll wish you scraped more. The oven cleaner breaks
the coating down into a really nasty black sludge. The less that's in the
door the better off you will be.
If you use the skin friendly version of oven cleaner you should still
wear gloves. Dive in with the scraper and started troweling the blobs of
goo directly into the garbage bag. Once you have the bulk of it out, grab
a roll of paper towels and wipe the rest of the slop out of the door. This
is a messy job, but once completed, you've finished the easiest part of the
project. That's right. The mess has just begun.
Now we come to the counter-intuitive part of the operation. Get a spray
bottle and fill it with water. That's right, water. A Windex style bottle
will do fine. If you're working outside and want to get really aggressive,
feel free to use the garden hose. I'm not kidding. We need to get all of
the oven cleaner residue out and we need to scrub all the mud out of the
bottom of the door. Don't worry about rust, it's already there. After 50
years, a little more water isn't going to make much difference.
As you hose the door down, the drain holes will almost certainly clog
up again. Break out your screwdriver again and open them up. Scrape that
lower groove out again while you're at it. Use plenty of water, the scraper
and screwdriver. When you have everything reasonably clean, use paper towels
to wipe everything dry.
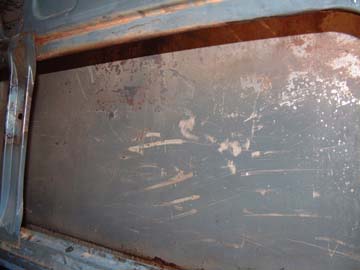
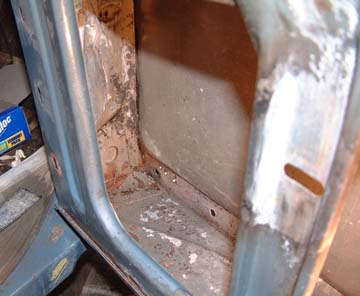
More Rust
More Rust
If you have to take a break for a few days or more, it is
important to kill off all the moisture. A day or two is okay, but any longer
can cause problems. To complete the drying, I use one of those portable arc
style lights. I stick it right in the door. It produces high heat and dries
out the door in jack time.
You will now discover that in spite of your best efforts, there are a
number of spots that still have a thin coat of rust-proofing. Scrape those
areas again, vacuum and repeat the oven cleaner process. Once again, you
can work on preparing another door while you wait for the cleaner to soak
in.
Once you've completed the second cycle of cleaning and drying, it's time
to treat the rust. There are a lot of coatings out there that claim to seal
and stop rust. POR-15 and several others come to mind. They all claim that
you can simply scrape off the loose flake rust, paint their product on and
live happily ever after. This is simply not true.
Rust is insidious. It forms microscopic pockets in steel. This is why
sanding doesn't remove it. You may think the steel is clean, but those pockets
are in there, just waiting for you to paint over them. Without proper treatment,
ordinary paint will start to bubble up within months. POR-15 is better, but
I've seen rust pop up under specialty coatings within 6 months.
The problem is that the specialty coatings work as advertised, but only
to a certain degree. They soak in and chemically bond to and alter the rust.
However, if the rust is too deep or thick, the problem is not cured, only
postponed. The specialty coatings can only penetrate to a certain depth.
If the rust is deeper than the chemical penetration, the oxidization process
continues the under the specialty coating.
The trick is to treat the rust and steel prior to applying a specialty
coating. In spite of the lofty claims, all coating manufactures offer metal
treatment products they recommend to be used prior to final coating. Even
POR-15 sells a pre-treatment product.
These are usually a phosphoric acid based solution. I won't claim to
understand the chemistry involved, but they do seem to work. The amount
of rust removed is proportionate to the amount of time, effort and solution
used. Follow the instructions and you shouldn't go to far wrong. A study
of many rust removers can be found at http://www.geocities.com/goodytommy/rust/
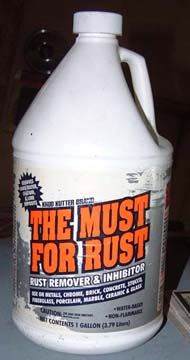
I'm using a product called "The Must For Rust." I can't say if it's better
or worse than others, but it is cheaper and comes in gallons. Grab another
spray bottle and fill it up. This time, goggles and gloves are an absolute
MUST. The acid solutions are fairly mild, but you do not want this crap in
your eyes, and prolonged skin contact is not pleasant either. Be sure to
use clothing you don't care about.
Cool Stuff!
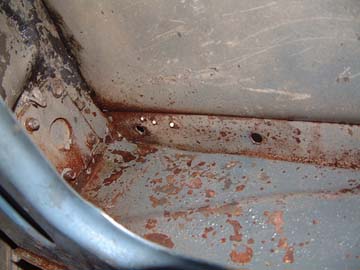
Using your spray bottle, hose down the entire door interior. Be generous. Let it sit for 5-10 minutes and get in there with a scouring pad. Try to hit every surface and put some muscle into it. When you're done scrubbing, hose it down again with acid. Repeat the waiting and scrubbing and hose it a third time.
Start scrubbing
After another 10 minutes or so, rinse the area with water.
Wipe out all the water with paper towels and then set a shop light in the
door to aid in drying. Make sure you check the drain holes and bottom groove
again. The makers of POR-15 claim it actually cures faster and stronger in
high humidity, but I just can't bring myself to paint over damp steel. It's
just not right, like blue food or arena football.
Once everything is dry, you may notice some deposits of a white powder.
Don't worry, your car was not used to smuggle drugs. This is a natural byproduct
of the chemical process that took place between the acid and the rust. I
am told it's actually a good thing for the final bond between metal and coating.
Wipe off any excess powder, but don't worry if there is a fine film.
Now it's time to apply the specialty coating. You will notice that in spite
of your best efforts, there are still areas of visible rust. Not to worry.
Our goal here was to eliminate it where possible and thin it down in less
accessible areas. There is only one way to truly create a rust free part.
The entire door would have to be removed and dipped at a facility like Redi-Strip
or Kwik-Strip.
I'm using POR-15 semi-gloss black. This is the original product offered
over by Resto Motive Laboratories. It is suitable for door interiors, frames
and other items that won't be exposed to direct sunlight. The product is
not UV stable, but that doesn't matter in this application. The product can
be bought in containers from a gallon down to 4 oz. cans.
It is best to use the smallest possible container for a given task. Once
opened, storing unused product can be problematical. You have to exercise
great care in keeping all spills out of the rim of the can. If you just jam
the lid on like regular paint, it will never open again. The product will
act like epoxy when dry and seal the can shut. All it takes is a few drops
and you have a very expensive can of garbage. I found that a 4 oz. can is
just about perfect for this process. I had less than ½ oz. left when
done with a single door.
Application is by brush in this case. For surfaces that will be visible,
I suggest using a cut foam brush. This will offer a nicer finish with reduced
chance of brush strokes. For our purposes, appearances don't really matter.
I'm using a cheap standard bristle brush. It is easier to just throw the
brushes away rather than trying to clean them. Don't use a nice brush because
even a trace of POR-15 after cleaning will ruin it.
POR-15 goes on like any other thick paint. It does have a few nasty characteristics.
Once it dries, it doesn't come off easily. Avoid getting it on your skin
or you will wear it until it wears away. The alternative is cleaning you skin
with xylene. Not a pleasant experience. I know a guy who took a bathroom break
without cleaning up first. That evening, he discovered that his…tool…had black
fingerprints on it. Needless to say, xylene was out of the question. His
wife was not pleased.
Anyway, it's time for the home stretch. Before doing the interior (being
faint of heart), I applied coating to the weather-strip channel and the slot
at the base of the door that holds the interior panel. Next comes the window
felt channel. These areas will give you practice and a feel for the paint
flow characteristics.
Sloppy but effective

And now for the fun. Gloves on, long sleeves rolled down, and dive into the door. The door interior should be completely coated, top to bottom, inner and outer. If not, why even bother with this operation. This means that you have to stick your head inside the door, contort around into different uncomfortable positions and, in some cases, peer down through the window slot while you paint with your arm stuck in the door.
No matter how careful you are, expect to get POR-15 on your face and in
your hair. Keep a wipe rag handy to get the worst of it. If you truly love
your car, you'll go through with this procedure, regardless of your appearance
for the next few weeks.
Once it's all coated, step back and take a deep breath. You only have
three more doors to go. I envy you lucky dogs with Cabriolets and Coupes.
The photos below are sequenced for a better idea of the process and to
offer our hero (that's me) a sense of accomplishment.
Yuck!

While writing this chapter, the process got worse and worse
in my mind. I broke down, waded into the basement and began searching. Two
hours of intensive digging was rewarded with buried treasure. In a past life,
I built aircraft and other military models. Long lost and almost forgotten
was my airbrush painting equipment. I have hauled it out and am cleaning
it up for use. It's got to be easier to paint this way. I'll let you know
how the experiment turned out next time.
That's all for now. I have a date with a can of oven cleaner and a Paasche
airbrush. And you need to stop reading and get back to work in the garage.
You have three more doors to complete.